Thursday, June 13, 2013

Thursday, May 9, 2013
2007 DUCATI SPORT 1000S LE Old School meets New School


Specifications-
Make Model - Ducati Sport 1000S Limited Edition
Year - 2007 (Production 90 US & 10 Canada Only)
Engine - Air cooled, four stroke, 90°“L”twin cylinder, DOHC, desmodromic 4 valve per cylinder
Capacity - 992 Bore x Stroke - 94 x 71.5 mm
Compression Ratio - 10.0:1
Induction - Marelli electronic fuel injection, 45mm throttle body
Ignition / Starting - Marelli electronic / electric
Max Power - 67.7 KW 92 hp @ 8000 rpm
Max Torque - 9.3 kg-m 67.3 lb-ft @ 6000 rpm
Transmission / Drive - 6 Speed / chain
Frame - Tubular steel trellis
Front Suspension - 43mm Upside-down jelly adjustable forks, 120mm wheel travel
Rear Suspension - Sachs fully adjustable monoshock on the left side 133mm wheel travel
Front Brakes- 2x 320mm discs 4 piston calipers
Rear Brakes - Single 245mm disc 2 piston caliper
Front Tyre - 120/70 ZR17
Rear Tyre - 180/55 ZR17
Seat Height - 825 mm
Dry-Weight - 179 kg
Fuel Capacity - 15 Litres


Wednesday, May 8, 2013
Kawasaki Ninja ZX 10R Sport Bike Pictures
 |
| New Kawasaki Ninja ZX-10R 2013 Black/White (Bi-Color) |
 |
| Black Kawasaki Ninja ZX-10R Sport Bike Picture |
 |
| New 2013 Kawasaki Ninja ZX-10R Red Black Sport Bike Picture |
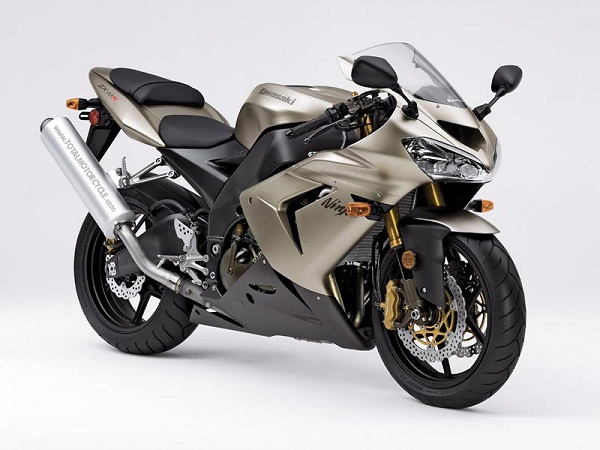 |
| Kawasaki Ninja ZX-10R Sport Bike--Black and grey Color Ninja ZX-10r ABS |
 |
| Kawasaki Ninja ZX10R Race Bike Picture |
 |
| New 2013 Kawasaki Ninja ZX-10R ABS Wallpaper |
 |
| Kawasaki Ninja ZX-10R Sport Bike Pictures-Red Ninja ZX10R ABS |
Monday, May 6, 2013
Sport Kit Installation Manual 2000 2003 KTM MXC EXC Dual
Get a degree in Mechanical and Electrical Engineering. (Just kidding!) 2. Remove the seat, fuel tank, and side panels. Stock switch Bracket Photo 2 EXC – Unplug and remove the stock headlight. (Photo 2.) Unplug the stock three-pin taillight connector and pull the taillight wires back to the rear of the airbox temporarily. MXC – Remove the stock front number plate. 3. Make sure the stock battery is oriented in its mounting bracket as shown with the positive terminal on the left side of the bike (as viewed if sitting on the bike). If not, remove and spin it 180 degrees. Photo 3 4. MXC ONLY! (EXC skip this step.) Locate the stock lighting wiring harness zip-tied under the frame back-bone (See Photo 4).
Remove the securing zip-ties and route this wiring forward to the area behind the headlight. Route along right side of frame using factory wire- guide clamp. 5. Brake Light Switch Installation: The KTM kit uses a hydraulic brake-switch. This requires replacing the rear master cylinder banjo bolt with a specially made switch. Installing the switch requires bleeding the brake. If you do not feel competent bleeding your rear brake, please refer this job to a qualified mechanic, as failure to do it correctly will make the brake inoperable. Remove the stock banjo bolt and replace with the hydraulic switch as shown. Make sure to install
Wednesday, May 1, 2013
Ducati Sport flexible LED Array Classic motorcycles FLEDA
FLEDA system with components and work guarantee. FLEDA system also has a 30 day money back, "no questions" return policy. You pay only the PAK BIKES.
FLEDA and number plate bracket assemblies has not been approved and are in the "road" and "the view" use only. The buyers response to all of these systems, in order to ensure the proper installation. FLEDA and number plate bracket assemblies are installed incorrectly can result in serious injury or death to the test equipment and/or passenger and/or of other persons, and FLEDA plate bracket Assembly equipped with a motorcycle in the vicinity. If the buyer does not have the skills to install these systems, they should be people with such skills, acting by a qualified majority, and FLEDA plate bracket Assembly in order to facilitate the installation of the.
FLEDA system replaces the Ducati Sport Classic motorcycles throughout the stock tail light and rear fender Assembly. It should be noted that all of the "road spray" protection stock tail light and rear fender Assembly lost FLEDA system.
Keep the stock tail light and rear fender Assembly is proposed in case you want to install it again at any time. It only takes a few minutes, change the system and between the system and the stocks of FLEDA and back again.